When working in Unity VR you’ll be met with a decision on how you want your hands to interact with your VR world. We’re going to start with what most users will have, hand controllers. To start, your hand controllers will need to be set up with an Interactor Component. Next the objects you want to interact with will need to have an Interactable Component.
For a step by step guide on how to set up a Unity project for VR check out: Setting Up VR in Unity .
Index
1 - Installing the XR Interaction Toolkit Package
2 - Updating from XRRig to XROrigin
3 - XR Interactor/Interactable Components Overview
4 - XR Grab Interactabe on ‘Grabbable Object’
5 - XR Direct Interactor on the ‘RightController’
6 - XR Ray Interactor on the ‘LeftController’
7 - Adding an ‘Input Action Manager’
8 - Final Working Interactions
9 - Exporting a Package
10 - Attach Transforms
11 - Other Interactable Components
1 - Installing the XR Interaction Toolkit Package
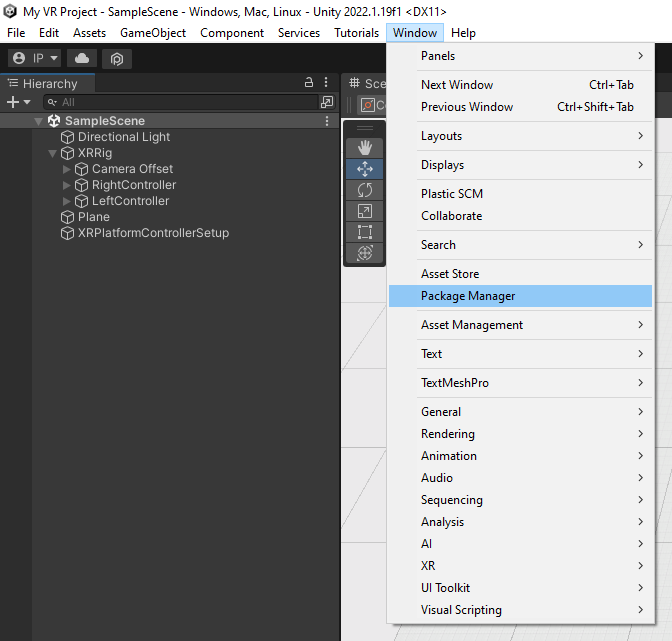
We’ll need to add a new Unity package to have access to the Interactor and Interactable script components. Open the Package Manager by going to the top left Window > Package Manager.
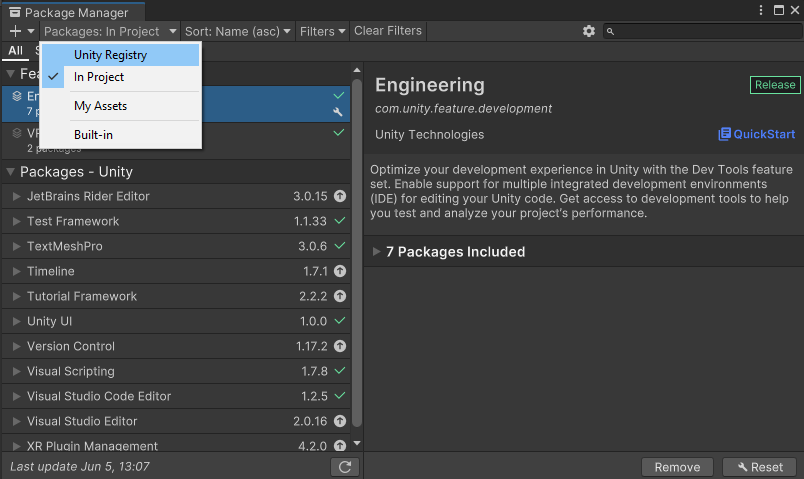
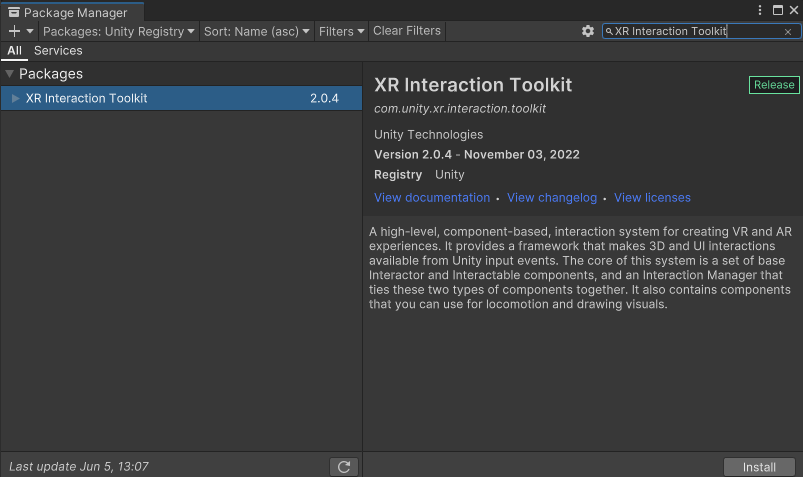
A new Package Manager window will open, filter packages you are searching for by selecting ‘Unity Registry’ in the Packages: ‘...’ dropdown box. Now in the top right search bar, search for ‘XR Interaction Toolkit’ and install. For this tutorial it looks like we are going to be using Version 2.0.4 and we can see that this package was made by Unity Technologies so we know it is safe and supported.
The package will now take a couple seconds to download and be stored in the Project window under the Packages folder. If you ever need to remove a package, follow the same process as above to find it (now it can be found in Packages: In Project and in Packages: Unity Registry) and click the ‘Remove’ button where before it used to be an ‘Install’ button.
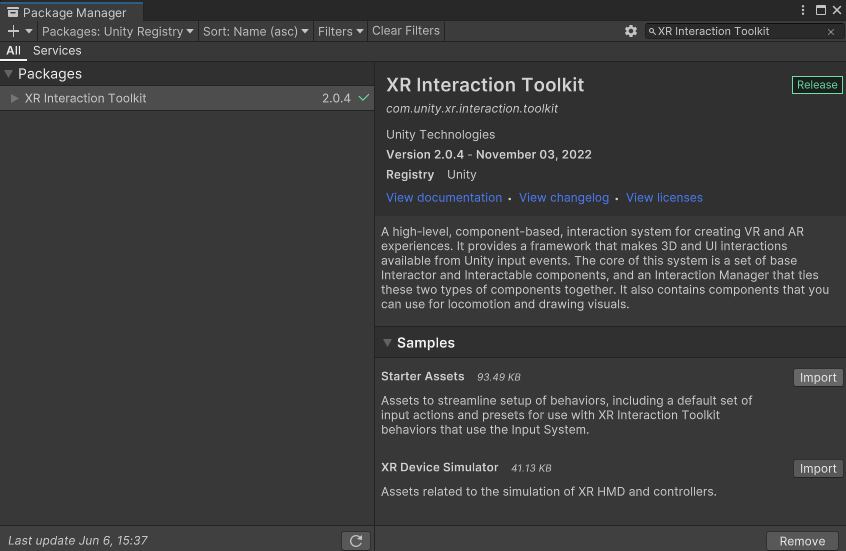
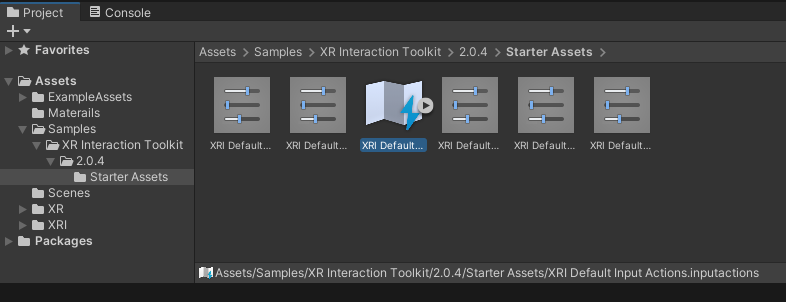
Open your package manager again and search for ‘XR Interaction Toolkit’ the package we just downloaded. You’ll notice that now we have the option of Importing two additional Samples for this package. Import only the first named ‘Starter Assets’.
You should now have a new ‘Samples’ folder in your Assets folder in your Project Window. We’re going to be using the ‘XRI Default Input Actions’ found in the ‘Samples > XR Interaction Toolkit > 2.0.4 > Starter Assets’ folder to set up our controllers for interactions in the following sections.
2 - Updating from XRRig to XROrigin
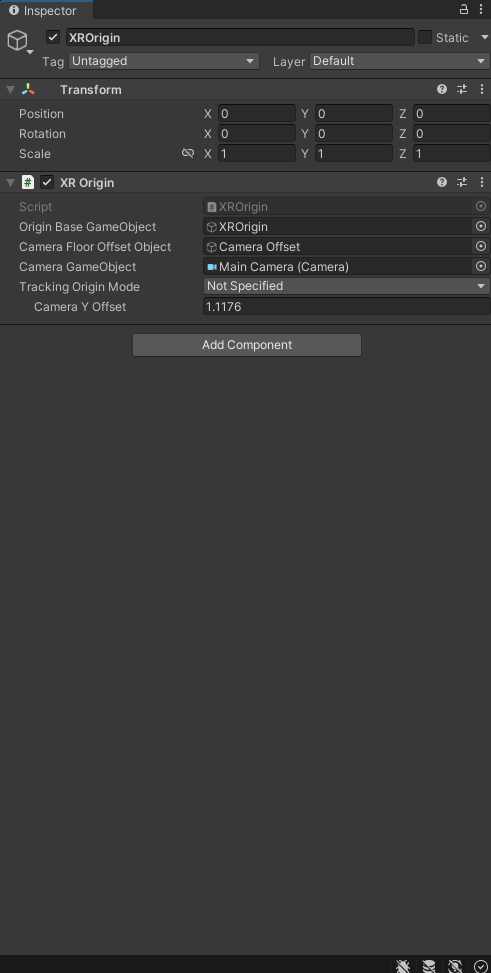
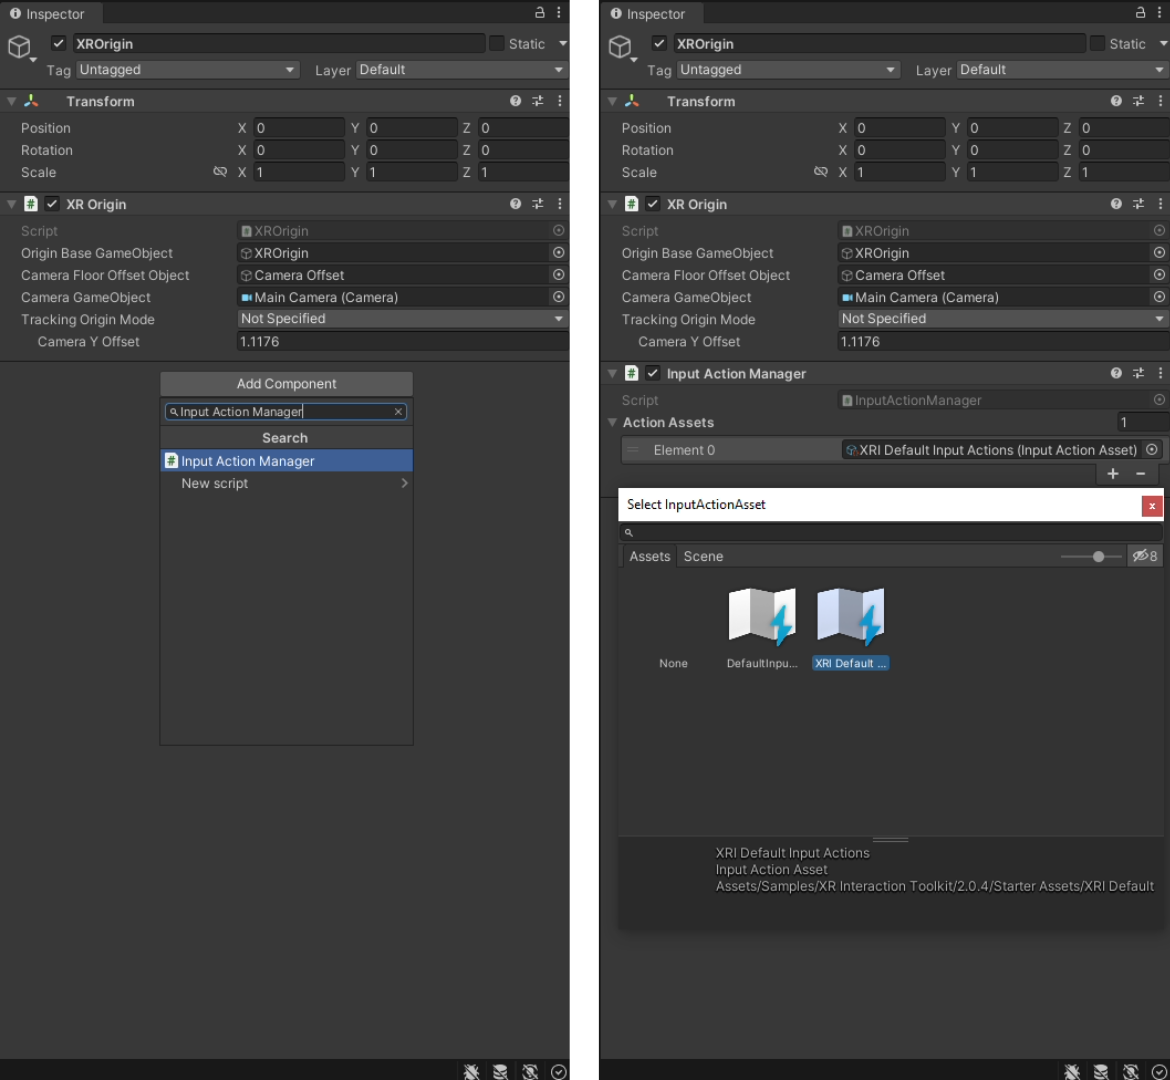
The XRRig is the older version and to avoid potential deprecation warnings or random bugs we are going to instead use XROrigin. Locate the XRRig game object in the Hierarchy Window and click on it to open it in the Inspector Window. We’ll only need to edit this base parent object and not its three children game objects (Camera Offset, RightController, and LeftController). Remove the ‘Camera Offset’ component by clicking on the three dots and selecting ‘Remove Component’. Select the ‘Add Component’ button and search for and add an ‘XR Origin’ component (notice that this newer version has a camera offset built in). Rename the game object from ‘XRRig’ to ‘XROrigin’.
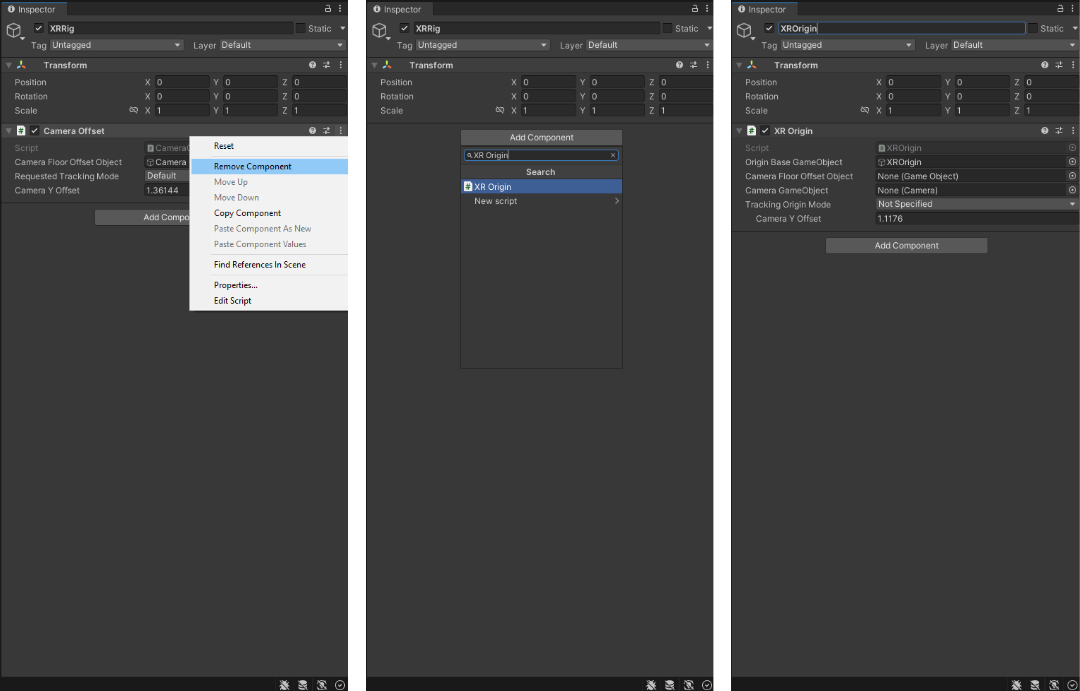
We’ll need to fill in some missing slots in the ‘XR Origin’ component. Click and drag the ‘Camera Offset’ game object (a child of ‘XROrigin’ in the Hierarchy Window) into the ‘Camera Floor Offset Object’ slot. Click and drag the ‘Main Camera’ game object (a child of ‘Camera Offset’ that has a Camera component on it) into the ‘Camera GameObject’ slot.
Quick Tip 1 - Editor Windows: If you ever accidentally close a window (Hierarchy, Inspector, Scene View, etc) you can always re-open them by going to Window > General and clicking on the Window you want. In the future you’ll find these other two useful Windows under Window > Rendering and Window > Animation for when you’re ready to get more artistic with your projects.
Great! You’re now ready to start adding Interactor and Interactable components to your project.
3 - XR Interactor/Interactable Components Overview
Interactable game objects are what we want our player/user to be able to interact with in the virtual world. We’ll start with a simple intractable red ball named ‘Grabbable Object’ which will have an XR Grab Interactable component that allows it to be grabbed by our two hand controllers when they are set up as XR Interactors. In the following sections we will also learn about Primitive Objects, creating Materials, a little about Colliders, Rigidbody Components, and the Gizmos Menu.
Unity allows you to add only one of two types of Interactor components to each of your hand controllers meaning you can mix and match between hands. These Interactors are the XR Direct Interactor and XR Ray Interactor (reminder that they can only interact with game objects that have an intactactable component). Direct Interactors require that you come into direct contact with what you want to interact with. Ray Interactors use a laser pointer called a Ray that will need to intersect with the interactable object before you are able to interact with it.
We are going to add an XR Direct Interactor to our ‘RightController’ and an XR Ray Interactor to our ‘LeftController’. Both the ‘RightController’ and ‘LeftController’ are children game objects that can be found under the parent game object ‘XRRig’.
If this seems confusing to you, don’t worry, we’ll be going over it in detail step by step. For now here’s a sneak peak at the finished product: both XR Interactors (hand controllers) working with an XR Grab Interactable (red ball).
4 - XR Grab Interactabe on ‘Grabbable Object’
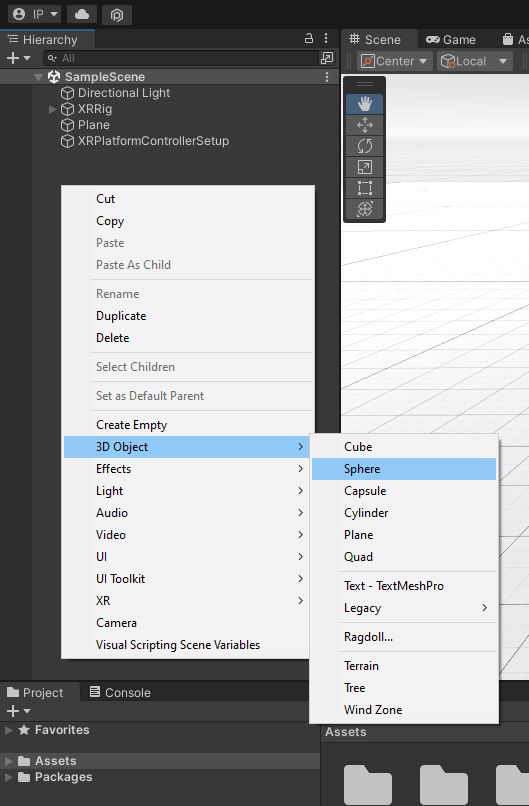
Now that we set up our hand controller with interactors we’ll need to add an XR Grab Interactable to any game object we want to grab. We’ll start with a simple ball. Right click in the Hierarchy Window and select 3D Object > Sphere to add a sphere. This is one of Unity’s six Primitive Objects.
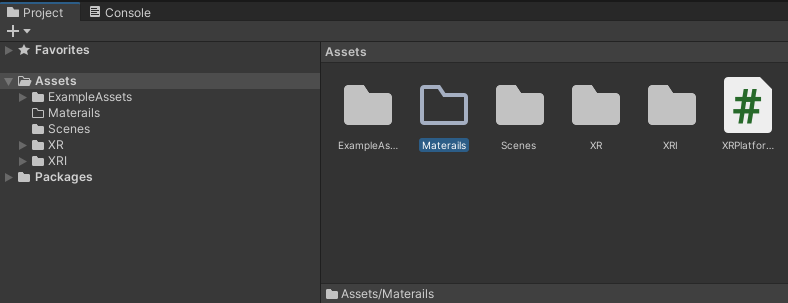
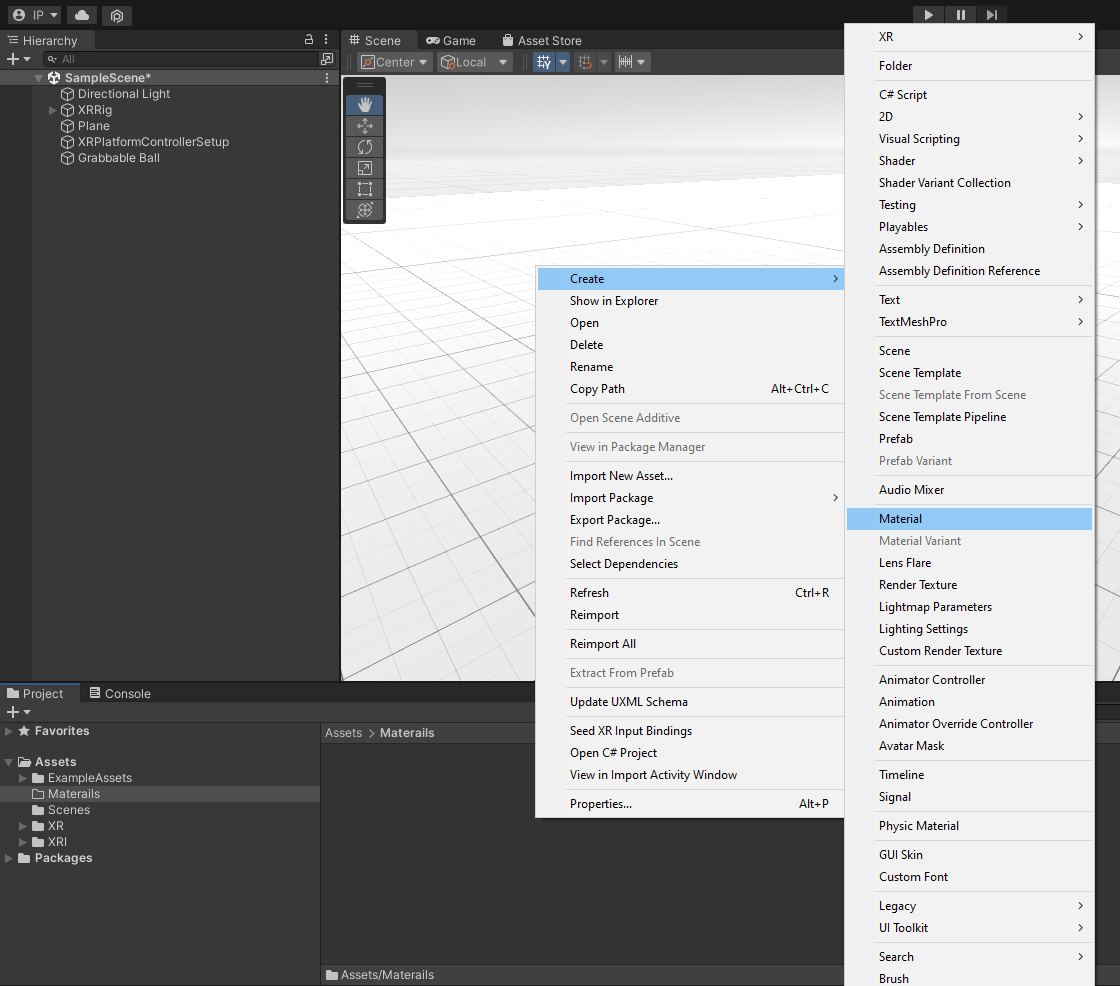
Right click in the Project Window inside the Assets folder and create a new folder named ‘Materials’. In Unity you can use Materials to change the appearance of game objects. Right click inside the new Materials folder to and create a new material, Create > Material. Rename the new material (I named it “Ball”) and choose a color by clicking on the box to the right of Albedo.
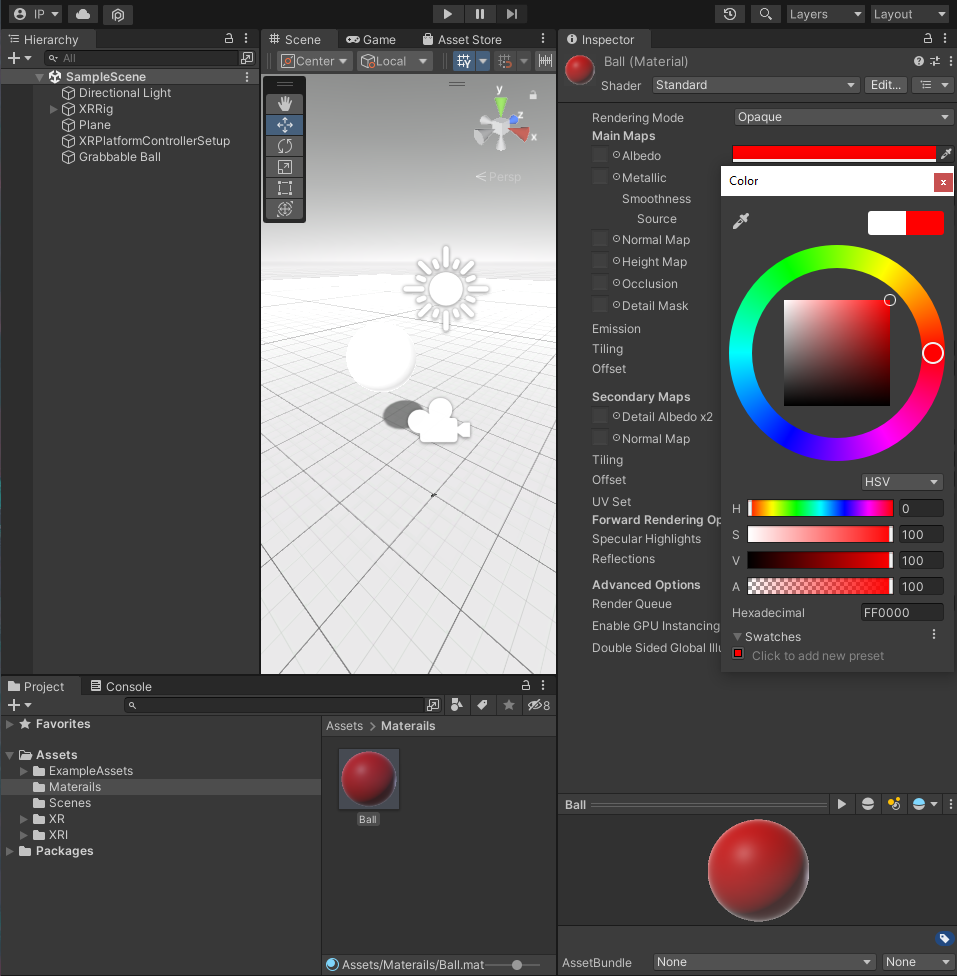
To apply the Material click and drag it (“Ball”) directly onto the Grabbable Ball sphere in the Scene View or onto the Grabbable Ball game object in the Hierarchy Window or into the Inspector Window if the Grabbable Ball is selected. Change the Position and Scale of the ball in the Transform Component so that now when you press the Play button you can have the ball directly in front of you (Position: 0, 1, 0.5 works well for me).
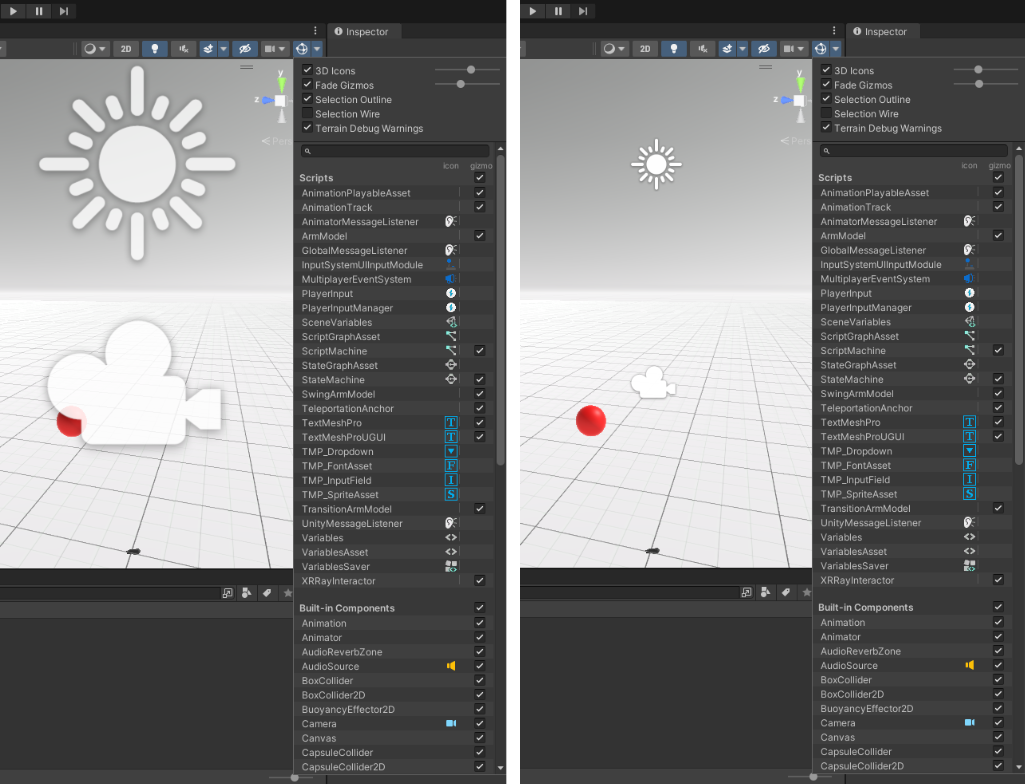
Quick Tip 2 - Gizmos: You’ll notice in the Scene View we have two big sun and camera icons. These are for the Directional Light and Main Camera game objects and are called gizmos. You can toggle these on and off by clicking on the Gizmos Menu but I like to just resize them smaller by adjusting the 3D Icons slider so they don’t get in the way as much.
Add an ‘XR Grab Interactable’ component to the ‘Grabbable Ball’ game object in the Inspector.
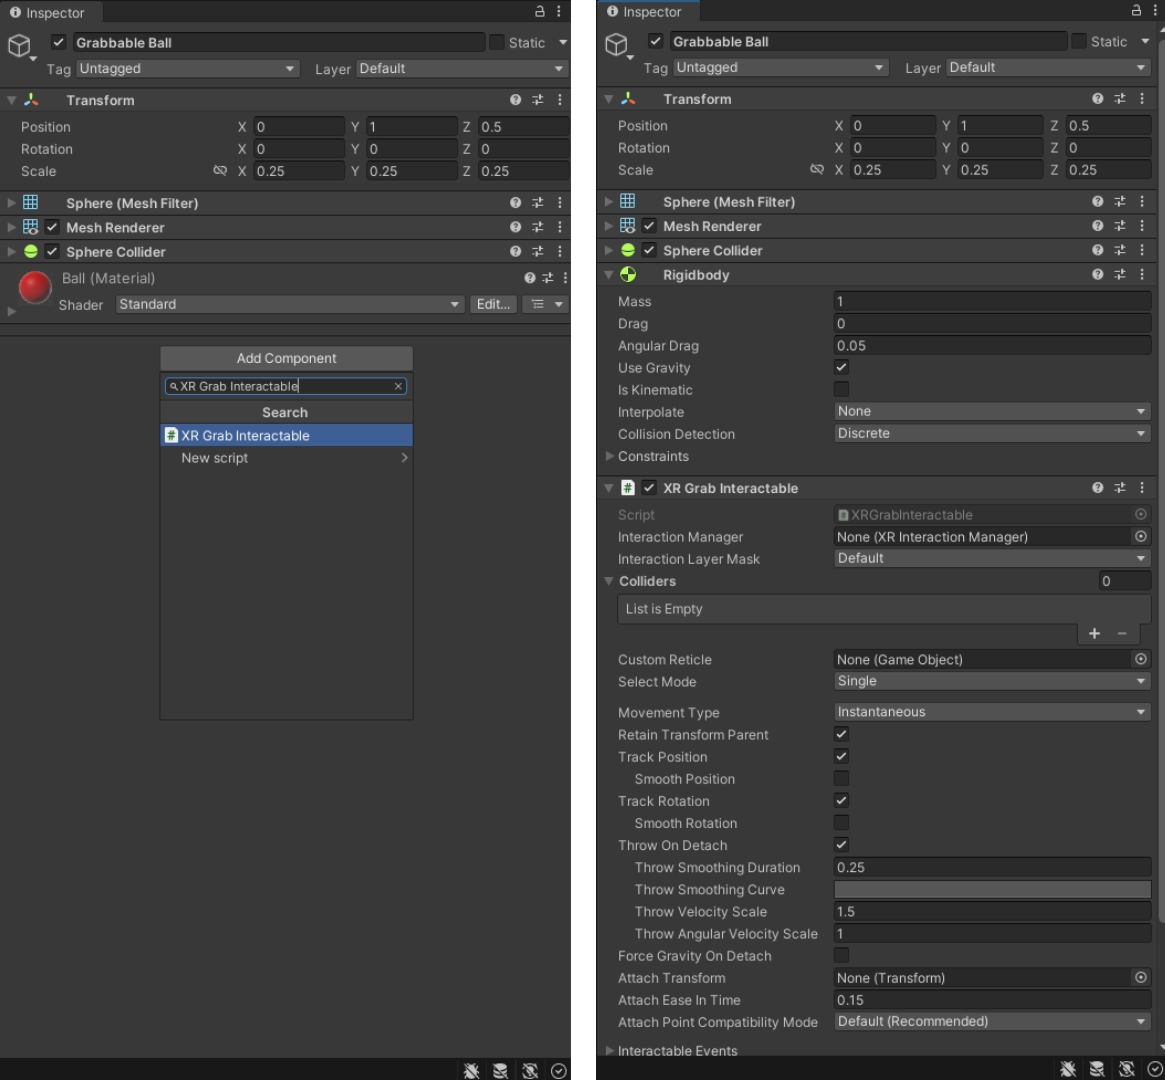
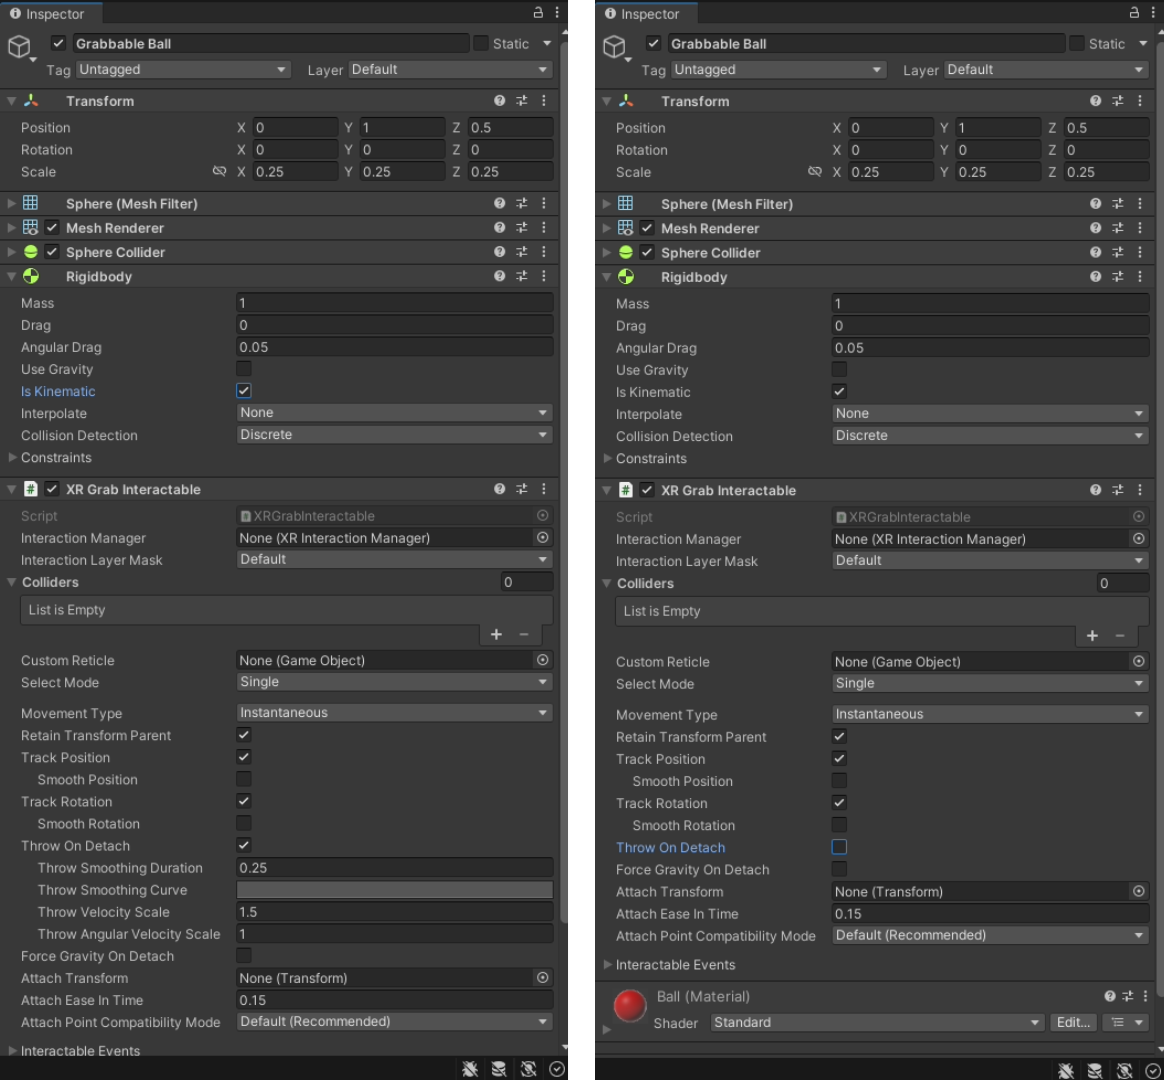
Notice that adding an ‘XR Grab Interactable’ automatically adds a Rigidbody Component as well. This adds physics to the game object. As is, the ‘Grabbable Ball’ is all set and ready to be interacted with. Because we haven’t set up a way for our player to move their VR body in game, I recommend we limit the physics on the ‘Grabbable Ball’ to prevent it from falling and rolling away.
In the Rigidbody component, uncheck the ‘Use Gravity’ checkbox and check ‘Is Kinematic’ instead (you can also change ‘isKinematic’ in script). When ‘isKinematic’ is enabled, physics will no longer apply on this Rigidbody. In the ‘XR Grab Interactable’ uncheck ‘Throw On Detach’ to disable the script from trying to throw the ‘Grabbale Ball’ you release it. This prevents warnings in the Console Window as ‘XR Grab Interactable’ can’t throw an object that no longer has gravity.
5 - XR Direct Interactor on the ‘RightController’
Add an XR Direct Interactor component to the ‘RightController’ game object.
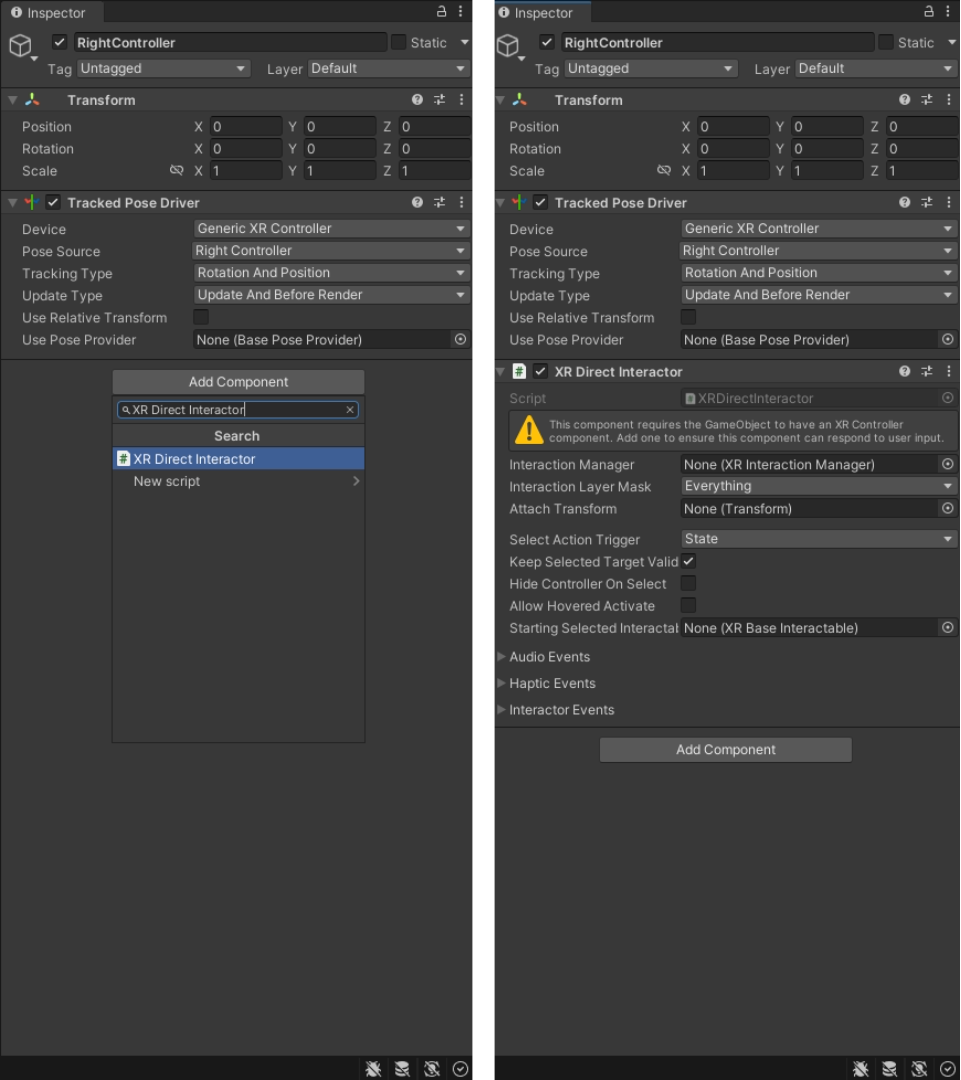
To fix the warning (yellow triangle) in the XR Direct Interactor component we’ll also need to add an ‘XR Controller (Action Based)’ component. We’ll be using Action Based instead of Device Based on this project so that if we ever want to export it, people with multiple types of VR headsets can use it unlike Device Based where we would have to keybind to a specific device.
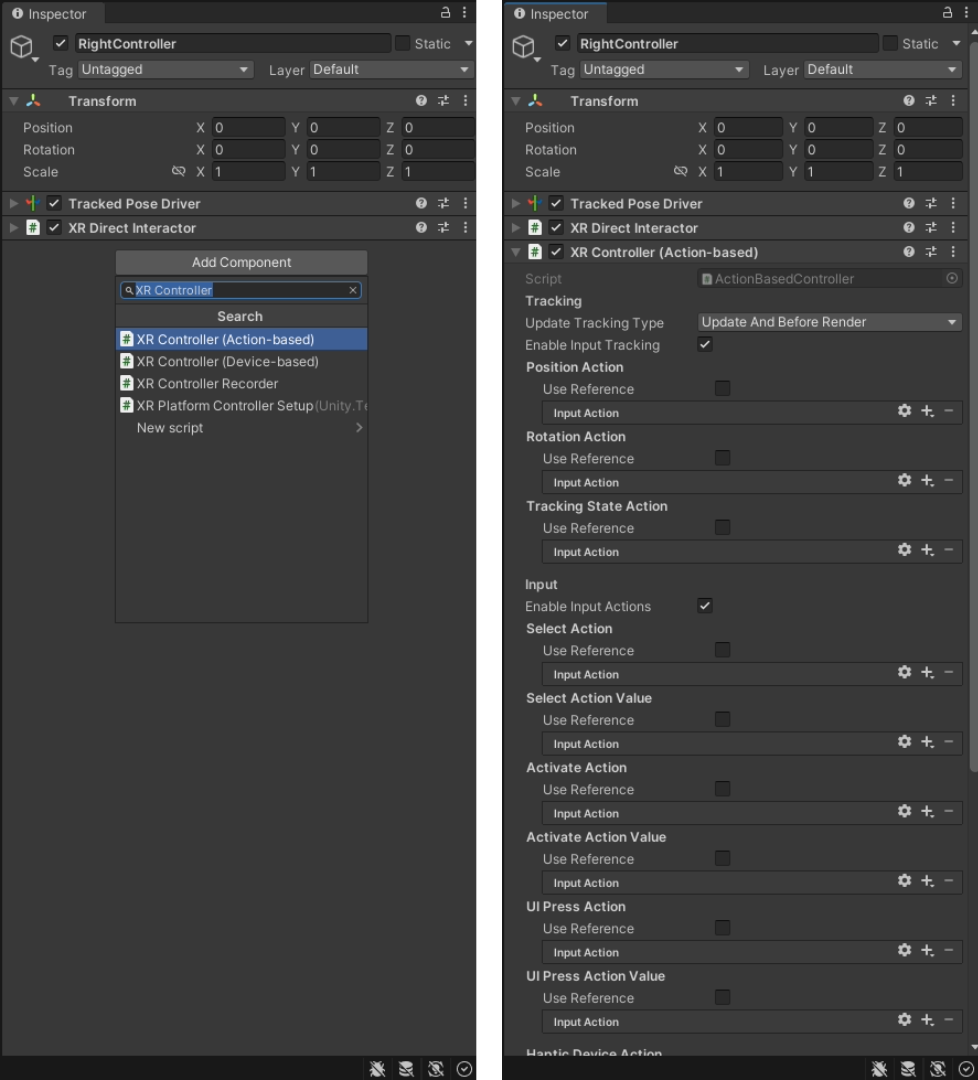
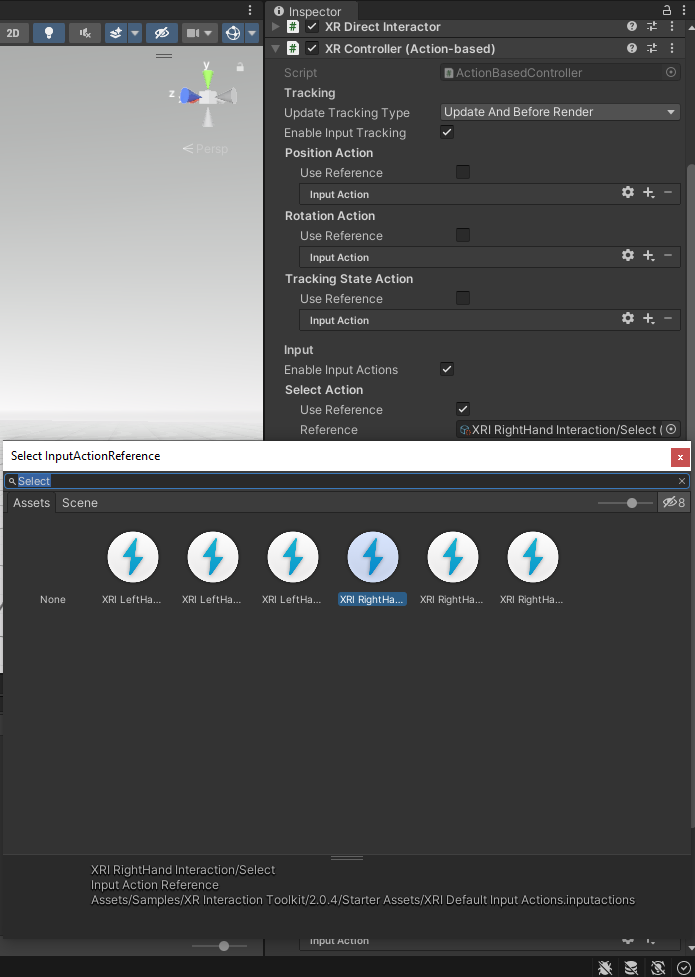
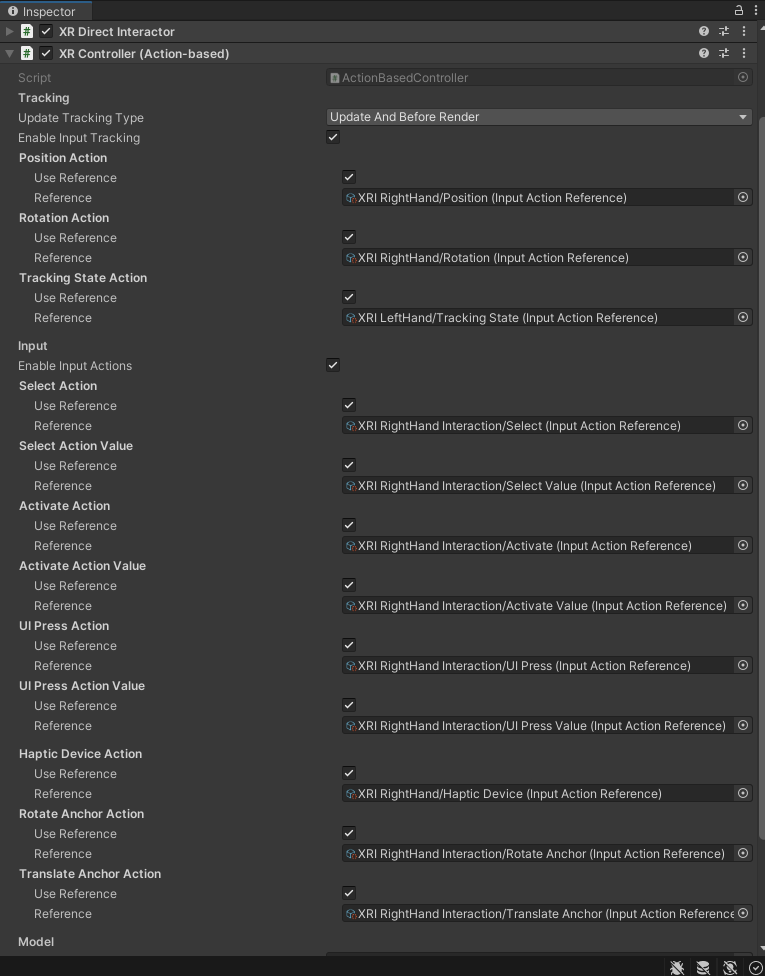
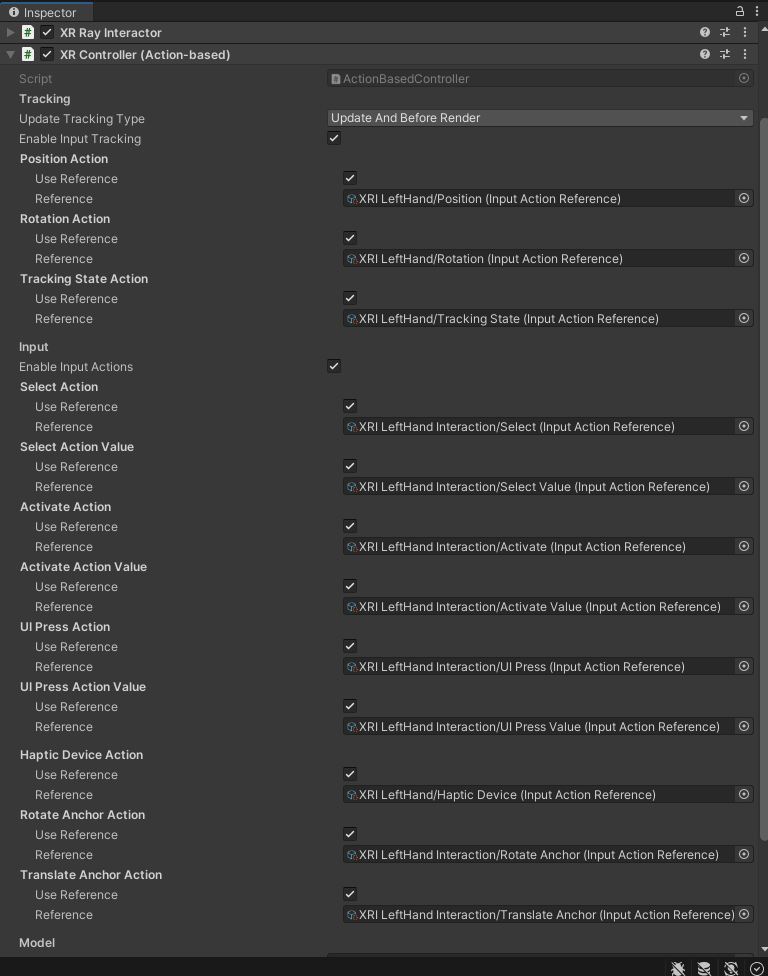
In the XR Controller (Action-based) component we need to add References to all the actions (buttons, analog sticks, triggers) that we are going to want to use on our controllers. We’re going to be using the ‘XRI Default Input Actions’ we downloaded above from the ‘XR Interaction Toolkit’ package. For this tutorial we only really need to have a Reference to the Select Action to be able to use the grip button on our controllers to grab things. Feel free to add references to all the other actions you think you’ll want to use as well.
Click on the Use Reference check box to enable it and then the target icon to the right of the Reference box to open the ‘Select InputActionReference’ Window. In the search box type ‘Select’ and choose ‘XRI RightHand Interaction/Select’. Below is a picture of all the correct References if you would like to add the rest of the Actions.
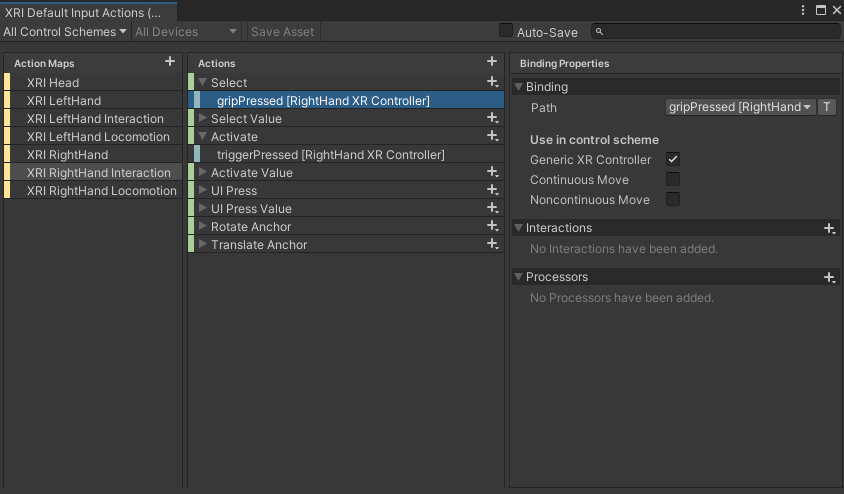
Quick Tip 3 - Input Actions: Explore the ‘XRI Default Input Actions’ found in ‘Samples > XR Interaction Toolkit > 2.0.4 > Starter Assets’. Double clicking the map and lightning icon opens up this window. For more information on creating your own Action Maps with Actions read this documentation on Input Action Assets by Unity.
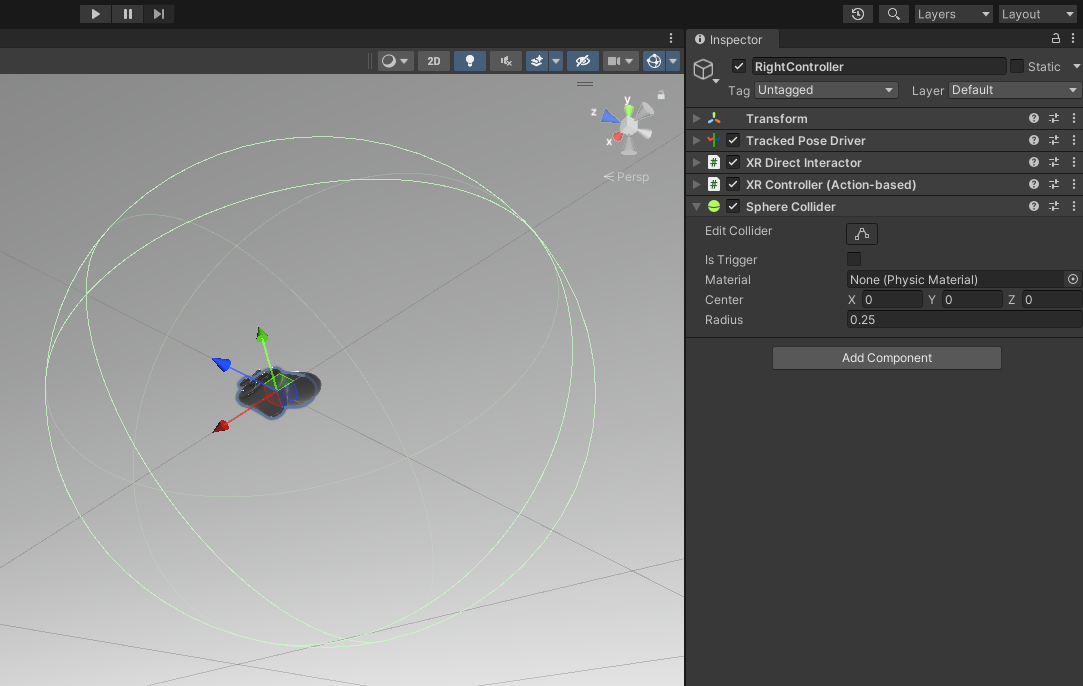
Direct Interactors also need a collider to be able to detect other objects that also have colliders. With an overlap of colliders and checking if the other object is interactable (all done by the XR Direct Interactor) we’ll be able to interact with the interactable object. We’ll be using a sphere collider but you could also use a box collider if you want it to better fit the shape of your hand controller. Add a Sphere Collider component to the ‘RightController’ and set its Radius to 0.25, a reasonable area to interact with.
Quick Tip 4 - Colliders: When adding colliders to game objects try to stick with primitive shapes and if your object is complex in shape feel free to use multiple colliders. However, try to limit yourself to as few colliders as possible. Many colliders can end up costing too much computing power and often fewer clunkier ones work just as well.
With that our ‘RightController’ is all set up to be used as an XR Direct Interactor. Next we’ll set up the ‘LeftController’ to be used as an XR Ray Interactor.
6 - XR Ray Interactor on the ‘LeftController’
Add an XR Ray Interactor component to the ‘LeftController’ game object.

We’ll fix the same warning we had in the XR Direct Interactor above (section 5 - fix warning) in the XR Ray Interactor component by adding an ‘XR Controller (Action Based)’ component. Just like before, we’ll add References to all the Actions in the ‘XR Controller (Action Based)’ component if you’d like or just to the ‘Select Action’ as that is all we will need for this tutorial.
For XR Ray Interactors you won’t need a collider as the ray is what is used to detect interactable objects. As is right now, grabbing with a ray works but we don’t have a visual to see where the ray is pointing. Add a ‘XR Interactor Line Visual’ component and notice that Unity automatically adds a ‘Line Renderer’.
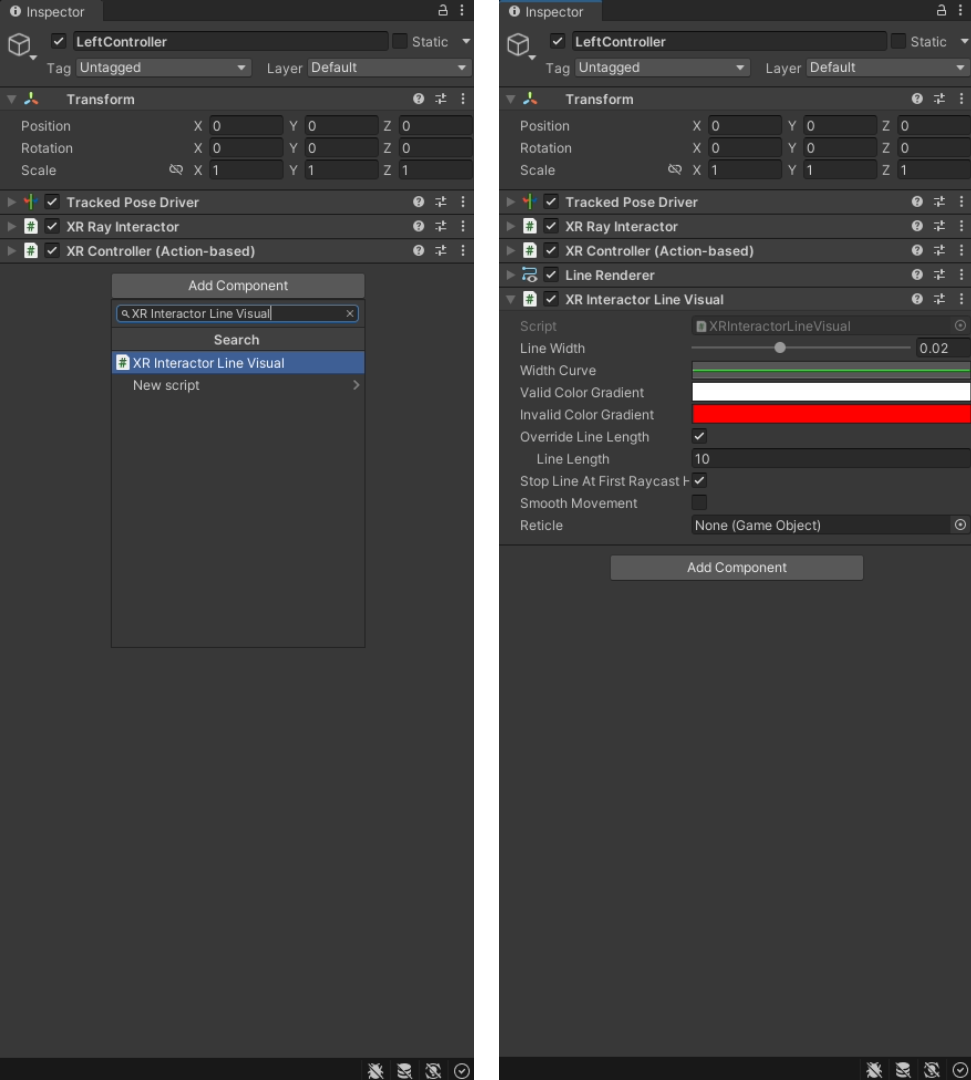
Quick Tip 5 - Pink Materials: In the Scene View you’ll notice a pink plane coming out of the ‘LeftController’. This is because we are missing the material needed by the Line Renderer. We’ll fix that in a moment. If you ever encounter Pink Materials again in the future know that it is Unity telling you that there is an issue with your material. It could be that you are missing a material, missing a texture, have an incompatible shader for your material, or are using materials that are not compatible with your current Render Pipeline.

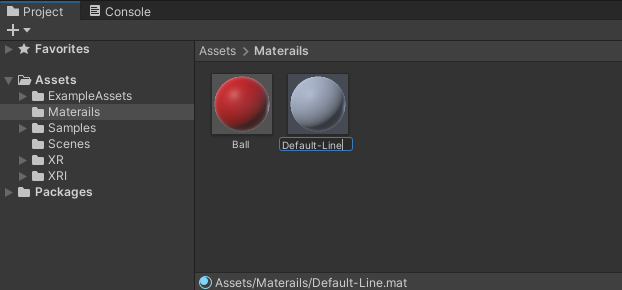
We need to add a material that the Line Renderer will reference and use to draw the line (ray) visual. Right click in your Assets > Materials folder in the Project Window (created above in section 4 - create material folder) and Create > Material named ‘Default-Line’.
Click on the material to open it in the inspector. At the top you’ll notice that this material is currently using the Shader: Standard. We’re going to change the shader, click the dropdown box and (at the bottom of the list) navigate to Legacy Shaders > Particles > Alpha Blended Premultiply. Now instead of having a solid line visual, like we did with a Standard shader, we have a semi transparent line visual using Alpha Blended Premultiply. The reason for using a semi transparent visual is that it's better on the eyes for depth perception, in my opinion anyways.
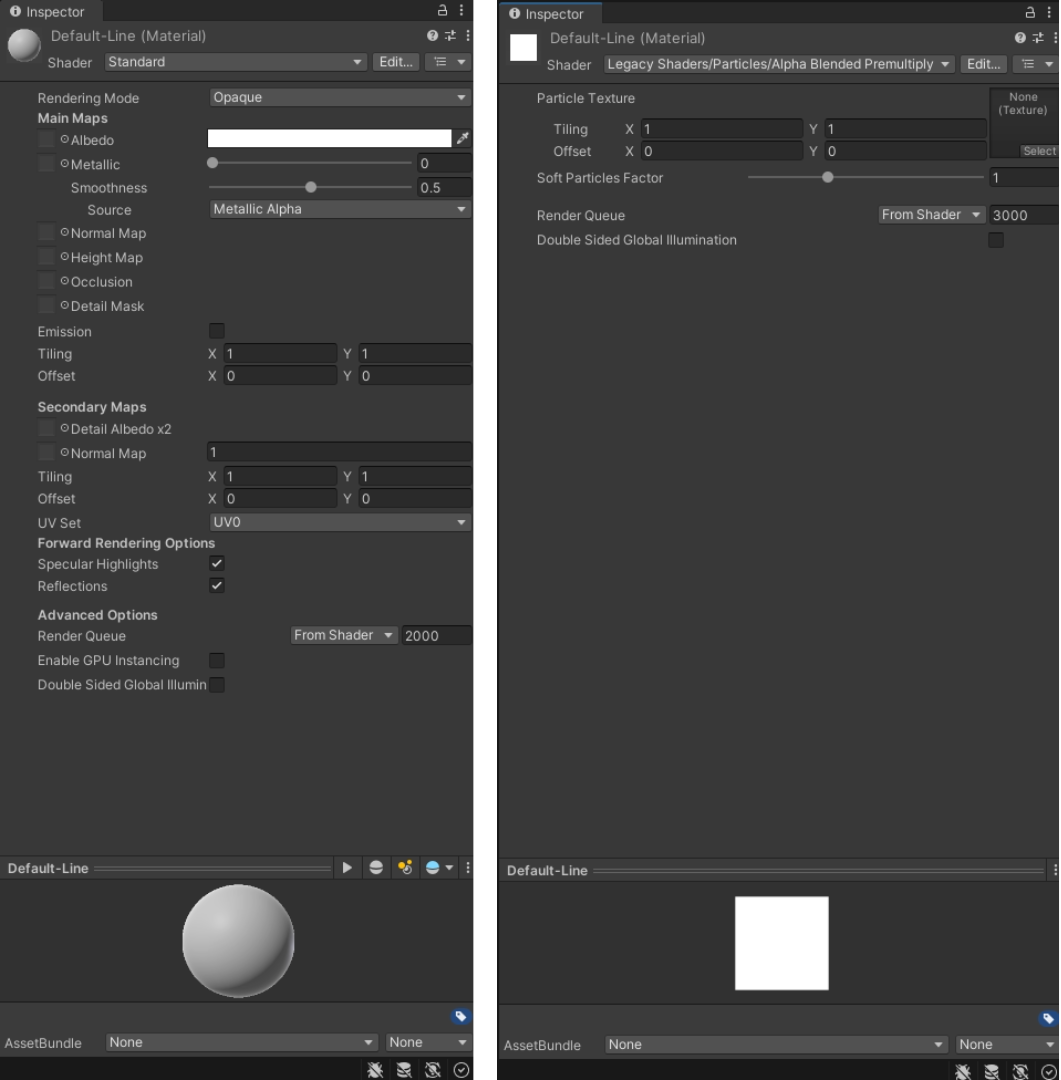
Click and drag the newly created ‘Default-Line’ material onto the ‘LeftController’ game object open in the inspector. Notice we no longer have the Pink Material error.

Feel free to play around with the settings in the ‘XR Interactor Line Visual’ to change how you want your line (ray) to look in width, length, and color when interacting with valid or invalid interactables.
We’re all set up and ready to use the ‘LeftController’ as an XR Ray Interactor.
7 - Adding an ‘Input Action Manager’
The last step to making everything work is adding an ‘Input Action Manager’ component to enable reading all the input action references we set up above. You can create a separate empty game object just for this or I like to add it to the XROrigin game object.
Add an ‘Input Action Manager’ component to the XROrigin game object press the plus button under the Action Asset dropdown to add a new slot for an Action Asset. Click the target button to the right of the new slot and select the ‘XRI Default Input Actions’ InputActionAsset from the pop up window.
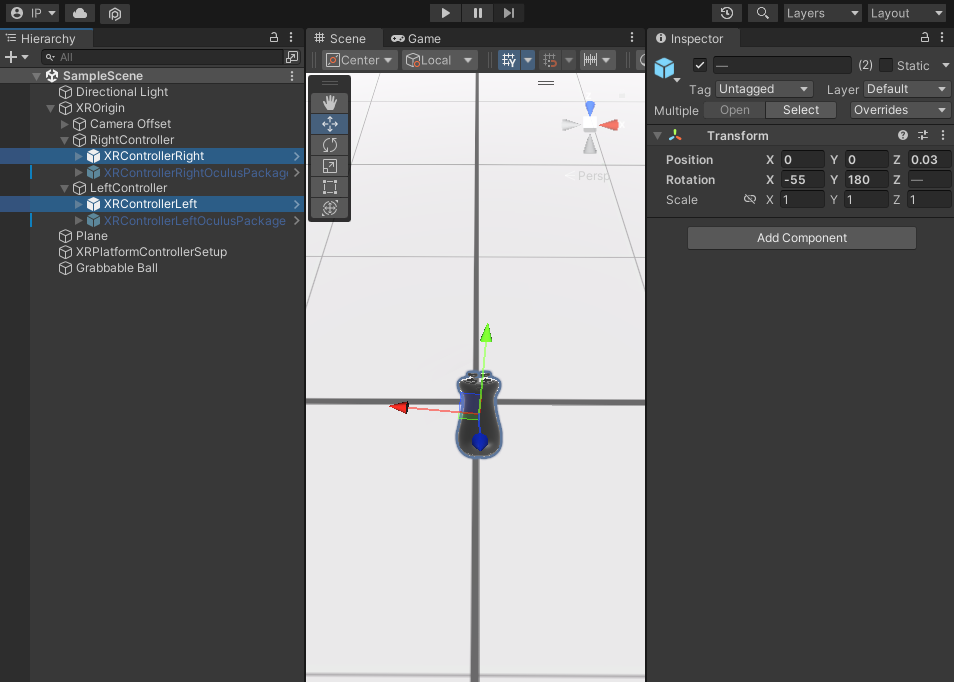
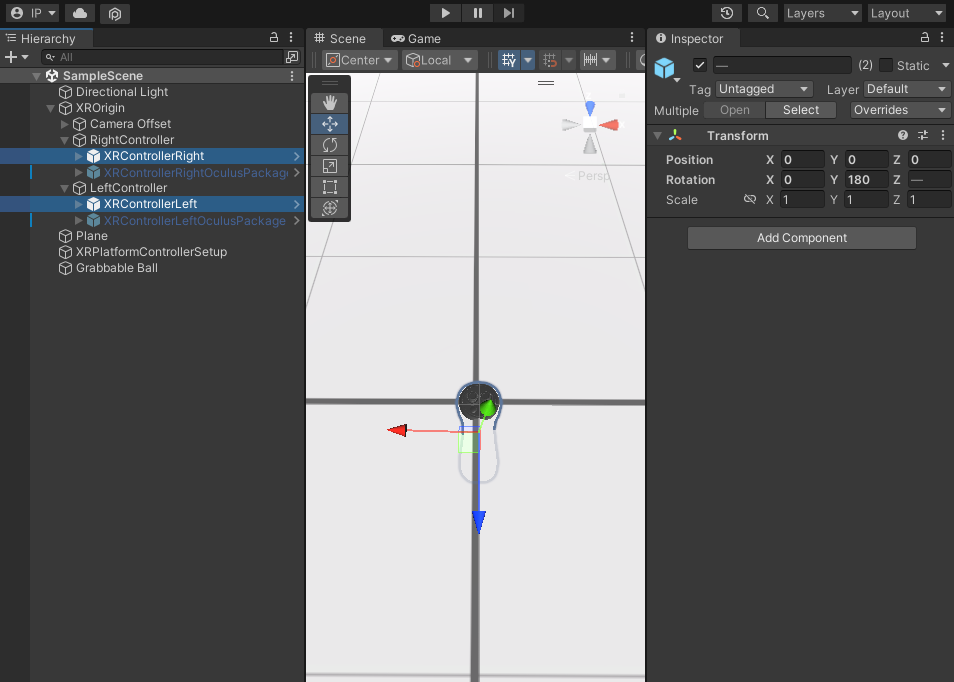
If you press play at this point everything will work but you’ll notice that our controllers rotation and position is a little off. For some reason adding an ‘Input Action Manager’ makes things a little weird but we can easily fix this by navigating to the blue lettered ‘XRControllerRight’ and ‘XRControllerLeft’ Prefab model game objects.
Select ‘XRControllerRight’ and hold down control on the keyboard to multi-select ‘XRControllerLeft’ as well. Now we can edit both of these in the Inspector at the same time. Reset Position Z and Rotation X to zero. Luckily this also fixes the origin point of the ‘LeftController’ Ray Visual and now it comes out of the front trigger area of the controller instead of the top of the controller.
8 - Final Working Interactions
We’re finally done and ready to test out both hand Interactors with the ball Interactable object. To grab objects with the Direct Interactor hand make sure the collider on the hand controller and the collider on the ball interactable object overlap. To grab objects with the Ray Interactor point the ray so that it intersects the collider on the ball interactable object.
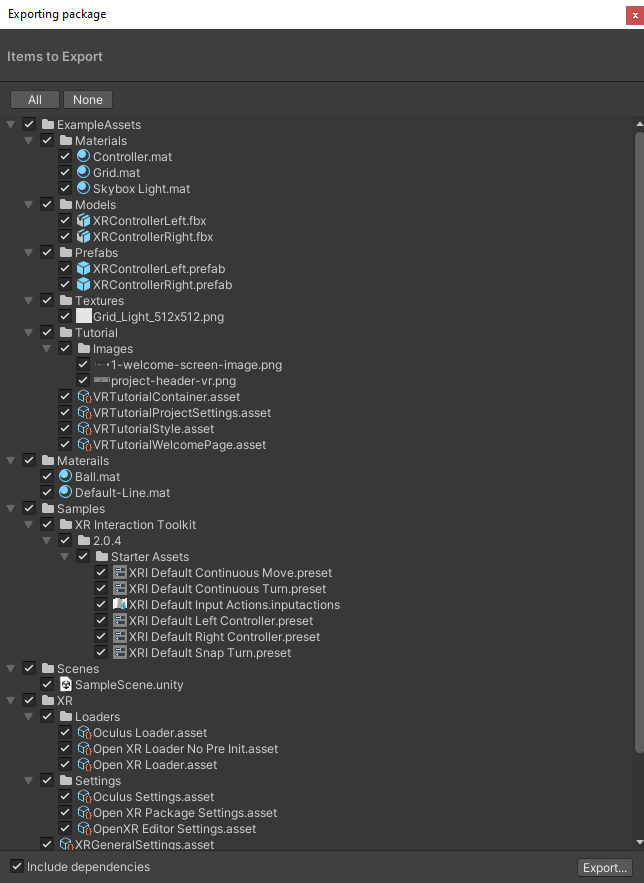
9 - Exporting a Package
Now that we have two different hand Interactors and a ball Interactable I highly recommend you export this current project. For future projects you’ll be able to import this basic setup and not have to go through all of these steps again.
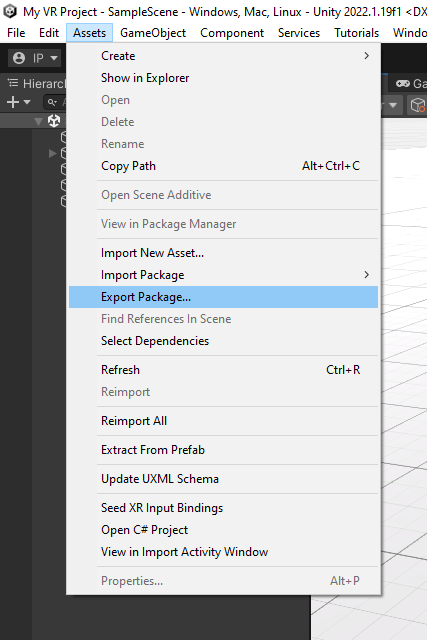
To export a Unity package that can later be imported into new Unity projects select Assets > Export Package… from the Menu bar. In the pop up window you’ll want to make sure everything is selected and on the bottom left make sure the ‘Include dependencies’ box is selected. Press the ‘Export…’ button, name your package, and choose an appropriate location to save your base starter VR Unity package.
10 - Attach Transforms
You'll notice that in both the Interactor and Interactable components there is an empty slot for an Attach Transform that takes a GameObject (Transform). If left empty, by default the Interactor and Interactable scripts will use the Transform of the game object they are attached to.
When a grab interaction occurs, direct or ray, these two Attach Transforms work together like a magnet and a piece of metal. The magnet is the Attach Transform on the Interactor and the piece of metal is the Attach Transform on the Interactable. The magnet is activated when you squeeze the grab button on your controller. That Interactable Object will then snap to connect with the Interactor object.
Notice how the orientation of the XYZ on the Interactable Object’s Attach Transform will snap to and match the orientation of the Interactor Object’s Attach Transform. This works well in the simple interaction above. When left empty without an Attach Transform it will use the transform location which is located at the center of the ball. However, sometimes the default transform location (the center of the lightsaber below) isn’t where we would like to grab.
In this case, create an empty Game Object named Attach Transform and make it a child of the Interactable Object's snap location you want to alter. Change its position and rotation (of the magnet) and drag and drop it into the Attach Transform slot.
Note: You can also add an Attach Transform to the Interactor Object if the default orientation isn’t where you think Interactable Objects should snap too. It’s usually fine, and unless it’s a really weird orientation, I’d leave it alone. However if you do decide to change it do it first and then I advise you to individually change the Attach Transform on the multiple Interactable Objects you are going to be using in your scene.
11 - Other Interactable Components
Unity includes an XR Grab Interactable as explained above (section 4 - XR Grab Interactable on 'Grabbable Object'), but there is also a XR Simple Interactable and a XR Tint Interactable Visual. Both are fairly simple and less complicated than the XR Grab Interactable. However, from these three base interactables we can inherit and modify their classes to create more complex interactable interactions.
From an XR Grab Intractable class we can create an XR Offset Grab Interactable that can be used with an XR Direct Interactor. This grab interactable doesn’t snap to the Attach Transform’s position and rotation but instead keeps its current position and rotation and pivots around where you grab.
From and XR Grab Interactable working together with an XR Simple Intractable we can create an XR Two Hand Grab Interactable that will allow you to hold an object with two hands. The first hand to grab the object will work as an anchor which the second hand can compliment to change the pitch and yaw (roll is controlled only by the first hand).